Wednesday, August 5, 2009

Iglesia de Cerro Grande

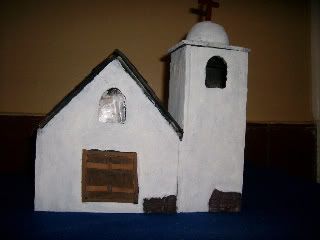
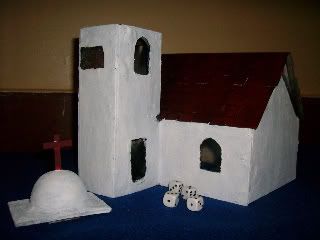
Just made some modifications to my Church. I removed the deformed top and replaced it with a better dome. I was lucky enough to find a discarded plastic Easter egg. What I did was drill a hole in the top where the cross would be fitted eventually. I then covered the egg half with masking tape and three coats of spackle. Once the spackle was dry enough I sanded down the high spots and found I need to drill the hole larger. The cross is made from 1/4" balsa and notched on either side. I also used a pencil sharpener to round out the bottom so it would fit snugly into the egg. Once everything was glued in place I primed black and repainted this piece. I decided to change the color of the cross so it would stand out. As you can see in the second picture the top is removed and reveals a dice tower. I just need to buy a bell to go into the tower and this will be all set.

Photobucket

Photobucket

Sunday, August 2, 2009

More Chronopia Figures

I just finished up a few more Chronopia figures. Another 8 are qued up on my paint table. There are a few slingers, warriors and 2 groups of Blade maidens left. Once I work through these I will switch gears for the Modern jets I have. They should prove easy to paint. For those who did not spot the previous conversion I removed the Wyrd's antlers and placed them on the Spearman. The Wyrd is the kneeling guy with the stag antler standard.

I have not painted or flocked their bases as I will be rebasing them with 30mm round lipped bases so these ones are only for painting. I want to order some Black Scorpion and Reaper Western figures to get that realm back on track but right now I have plenty of stuff to paint and convert.

The guy with the double bladed axe is also a conversion.

Photobucket

Photobucket

Wednesday, July 8, 2009

Chronopia: War in the Eternal Realm

Hey y'all. I know what you are thinking, "Why would you bother with an Out of Production (OOP) game system?" The system may be OOP but the support is still around via a PHP forum for Excelsior Entertainment. There is also an annual wargame convention for both Chronopia & Warzone. I put together a Sons of Kronos Chariot for a contest at said website. I was originally looking just for some blade maidens to spice up my Hordes army as blood trackers but found a good deal on ebay. This is the first of the bunch that I won. I will be painting up the rest in anticipation of next years gaming convention.

Photobucket

Chariot with different rider with an adjusted pose. The chariot is missing the scythes, I'll probably correct that later. I also want to replace the horses with a Hordes Argus (read big dog) so it will be more like Cuculhain's chariot.

Photobucket

First of three foot troops painted.

Photobucket

Just finished Aonbarr Horse Warrior

Tuesday, June 23, 2009

Prince Zuko

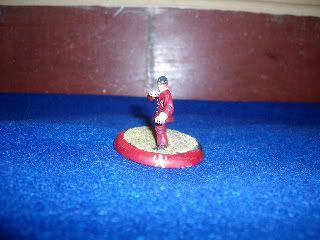
For those fans of the Nickelodeon series, like me, I present my version of Prince Zuko in 28mm. This is a Hasslefree miniature "Tanshiro". Note the Fire Nation symbol on the front. I even painted his face scar. It is kind of hard to see at this resolution but my photobucket site has a bigger version. I am waiting on an order to I can paint up an Air bender. I have already finished an Earth Bender "Isawa Tadaka" from the Clan War line. There are several reaper miniatures I am interested in ordering as well. Another line has some sweet miniatures is Anima Tactics by Fantasy Flight games. I will most likely pick some of these up later in the year. I also have some ideas for a quick skirmish game for these benders.

Photobucket

Wednesday, June 17, 2009

Another Cabin

I had this idea of using rawhide dog chews for making a cabin. What do you think? This is sposed to be a crude and hasty built shelter. I found out that the chews are weaker than I expected and that many broke during construction.

If I did this again I would just use them as is and stack them alternately. That would have lave large gaps but that would be fine. I would just need to find things to stuff in them. I'm thinking putty and some pine branches (to scale of course) would be a good idea.

I also found out that I should have built this one level at a time instead of one wall at a time which made it a bear to try and fit together. Thank heaven for pva glue and putty.

Photobucket

Friday, May 29, 2009

Frontier Cabin Tutorial

Well, I just ordered me some Conquest Miniatures 19 woodland indian troops. While I wait for their arrival, I decided to put together this frontier cabin. The great thing about it is it will be used as a miners cabin for the wild west as well.

The first step I always take for creating a terrain piece is research. I like to use the interweb, books, or movies for inspiration. Once I find a building type that I like, I will sketch out the idea. Once the sketch is done I like to do a mock up for a new piece in cereal box card board. This way I can adjust my scale so it looks like I want it to.

Photobucket

Cardboard scale model.

For this project I found the long walls at 4 inches and short walls at 3 inches makes for a good one room frontier cabin. I also wanted to add an exterior chimney since the photo I found also had one.

My first obstacle was to figure out the lightest and easiest way to make stone for the chimney. I asked for advice on TMP but settled on using balsa wood scraps. What I did was to cut scraps in various lengths and widths. Then I would round off the two exterior facing sides and then carve in some variations to each. No pics of this boring and time consuming part. This took two days of on and off work.

I also wanted to do planed wood with chinking instead of round timber. Since I have flat balsa this is the way for me to go. I used my templates as a guide and cut out all of the walls. I then scribed the walls with a dull pencil and tried to make the scribes wide and uneven. This would leave space for the chinking. I then assembled the pieces for the walls and the roof. I made the chimney form from balsa as well and glued all the balsa stone to the structure.

Photobucket

For the roof I decided on using the tried and true method of strip shingles. This is where you cut a strip of cardboard the length of your roof with a slight over hang and then cut shingles half way through all the way down the strip.

Photobucket

You always start at the bottom of the roof and work your way up. Once I got to the last run of shingles I cut each one out individually and glued them in place one by one. This should give the illusion that the whole roof is made this way.

Photobucket

Once the roof was complete it was time to get the model ready for paint by using primer. I always use black on all my models, it is a personal preference. I just find it easier to paint this way. Sometimes one coat is not enough and two coats are required. I believe the wood sometimes absorbs the paint and expands as some of my scribes seemed to have narrowed.

Photobucket

The model is now more unified with the one color primer

The last and easiest part is to paint the model. I wanted a simple paint job for a simple model and just used two coats of brown for the wood and two of grey for the stone work. There you have it simple but a little labor intensive frontier Cabin.

Photobucket

Cabin ready to repel indians!

Thursday, May 21, 2009

Capitol Infantry Squad

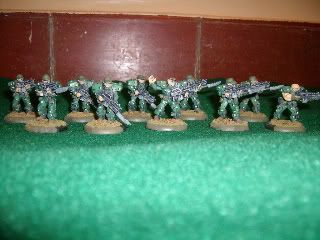
I was feeling nostalgic and painted them over the past 3 days. I saw some Bauhaus over at the Excelsior Entertainment forum in chocolate chip and urban chip so I decided to try a Jungle chip pattern. You'll have to look at the photobucket page to see them more clearly. They need a few tweeks but I call em done.

Photobucket
 
hit
Click for hit counter code.