Thursday, February 4, 2010

I have finished my "Quarmy"

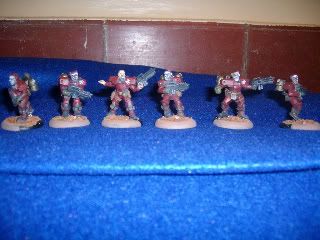
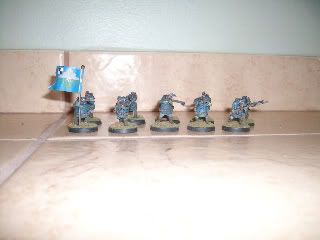
It has been a long road but I have finished painting 99% of my Quar Royalists. All I have left is two heavy weapons and one arm that got left off of one model.

At first, I was a bit overwhelmed by the magnitude of the task as I had to glue all of their heads and back packs on which turned out to be a rather fidly affair. I think the high humidity also played a part in them taking a while to set and the complete lack of zip kicker also slowed me down. I also had a few casualties from them falling over and losing their heads. I mounted them all on 25mm slotta bases stolen from other models. I think they came out rather nice for my little army of proto-aardvarks.

Future plans include buying a Spanish revolution era tank and truck for support. I want put a field kitchen together on a trailer. I have plans for an observation balloon as well.

Photobucket

Sky view downwards on the "men"

Photobucket

Front view of the army.

Next up on the painting table is more Sons of Kronos for Chronopia.
Tuesday, November 24, 2009

The Quar have arrived

Well sort of. They have arrived on my paint desk. I have quite a few to work through. I have finished 10 of them so far and am looking forward to working through the rest over the holiday season. I got one of the Royalist faction army deals earlier this summer and am just getting around to painting them as I settle in to my new apartment. The other faction is the Crusaders who look more modern with their uniforms. I am basing mine off of Napoleon's Bavarian allies Osprey book. The unit name is the 890th Fusiliers. It is hard to make out but at the bottom of their jackets is green pipping.

Photobucket

Saturday, September 26, 2009

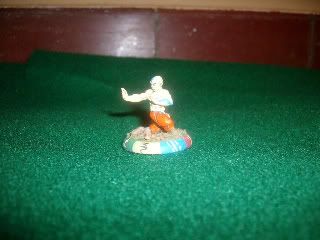
Avatar Aang

I finally got my Hasslefree fig which came in on back order and I painted him up as Avatar Aang. I don't know how clearly you can see the psuedo-kanji on the base but he has all the nations on his. I am putting together models that look similar to the characters on the show and have a decent amount I will be ordering from Reaper miniatures.

I plan on writing up some simple rules to go with the miniatures but don't know how long that will take me. The flash washed out the details a bit but he has the Air Nomad tattoos and is wearing a yellow sash and orange pants, with brown boots. This was an easy paint job and hope the rest will be the same. Without further a do here is everyone's favorite Avatar.

Photobucket

Tuesday, September 22, 2009

Cantina built for Cerro Grande

Just finished my third adobe structure, and this time it is Rosa's Cantina y Mercado (Bar & Store). I'm happy how it turned out as I tried something new. For the roof I took one part of a cardboard box and soaked it till the backing was saturated. Once it was like this I pealed on of the layers off and revealed the corrugated side. I was going to do this to both sides but found it would not work as it simply deformed the remaining corrugation so it lost it's form. I wanted to cut it into strips and layer it but I think it looks ok as is.

I also tried a slightly different technique with the wooden doors and brick work by adding a layer of brown ink on top to try and bring out the grain/bricks.

I will be making a smaller Casita to go into the Texican side of town.

Photobucket

Thursday, September 17, 2009

More Capitol Troops

Just finished a few more Capitol Troops for my growing army. These are the Martian Banshees. I did them in the same scheme as they are in the Warzone Book. They were fairl easy to paint up and I needed a brake from all the Chronopia figures I had been painting.

Photobucket

Wednesday, August 5, 2009

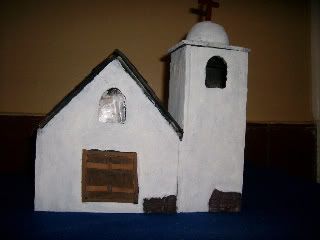
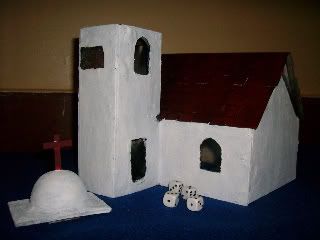
Iglesia de Cerro Grande

Just made some modifications to my Church. I removed the deformed top and replaced it with a better dome. I was lucky enough to find a discarded plastic Easter egg. What I did was drill a hole in the top where the cross would be fitted eventually. I then covered the egg half with masking tape and three coats of spackle. Once the spackle was dry enough I sanded down the high spots and found I need to drill the hole larger. The cross is made from 1/4" balsa and notched on either side. I also used a pencil sharpener to round out the bottom so it would fit snugly into the egg. Once everything was glued in place I primed black and repainted this piece. I decided to change the color of the cross so it would stand out. As you can see in the second picture the top is removed and reveals a dice tower. I just need to buy a bell to go into the tower and this will be all set.

Photobucket

Photobucket

Sunday, August 2, 2009

More Chronopia Figures

I just finished up a few more Chronopia figures. Another 8 are qued up on my paint table. There are a few slingers, warriors and 2 groups of Blade maidens left. Once I work through these I will switch gears for the Modern jets I have. They should prove easy to paint. For those who did not spot the previous conversion I removed the Wyrd's antlers and placed them on the Spearman. The Wyrd is the kneeling guy with the stag antler standard.

I have not painted or flocked their bases as I will be rebasing them with 30mm round lipped bases so these ones are only for painting. I want to order some Black Scorpion and Reaper Western figures to get that realm back on track but right now I have plenty of stuff to paint and convert.

The guy with the double bladed axe is also a conversion.

Photobucket

Photobucket
 
hit
Click for hit counter code.